
Lora S. Irish, an internationally-recognized artist, is the author of many books on carving including The Great Book of Carving Patterns. Woodcarving Illustrated and Scroll Saw Woodworking and Crafts magazine also include her contributions. In this article, we'll introduce you to her latest collection of scroll saw patterns, North American Wildlife Patterns for the Scroll Saw. Irish also publishes a variety of publications, including Lora S. Irish's popular blog Scroll Saw Woodworking.
Lora S. is an internationally recognized artist
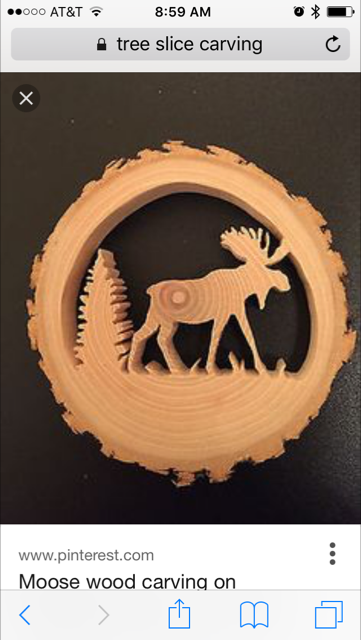
These scroll saw wildlife patterns will appeal to those who are passionate about animals and nature. They are easy to follow with black-filled images showing the cuts. These designs are ideal for wall decoration, but they also have many practical uses, including decorating basket lids and adding interest to shelf braces.
This book's scroll saw patterns were created to highlight wildlife from around the globe. You have more than 50 options for line patterns. The patterns are easy-to-follow and include basic cutting instructions. Each pattern has several simple instructions to help you get started, including a six-page gallery of finished designs. Make sure you carefully read the instructions while you scroll so you don’t cut too fast.
She is the author of North American Wildlife Patterns for the Scroll Saw
This book features 61 beautiful designs for the scroll saw. The patterns have clear instructions that are easy to follow and step-by. The book is shipped directly from the manufacturer. You may print a copy for your own use, but the pattern cannot be duplicated for resale. However, you can photocopy or scan the patterns to use on other machines.
Lora S. Ireland, a renowned artist, wrote this book. The 61 patterns in this book include dragons, bears, deer, birds, and more. This guide includes detailed instructions on choosing blades and making inside and outside cuts. Instructions also include tips for modifying the patterns to fit your needs. Irish's artistic talent spans many mediums including wood carving and is best known for her intricate relief-carving patterns. Her books have been included in many magazines and are highly recommended to scroll saw enthusiasts.
FAQ
Where can I find free woodworking plans?
Free woodworking plans are available online. You don't even need to buy books or magazines. Just search Google. You can search Google for "free woodworking" and hundreds of websites will appear allowing you to download plans.
What tools are used by carpenters?
A hammer is probably the most widely used tool for carpenters. A hammer can be used to drive nails into wood. They can also use it to hold the pieces together as they work on a project. Other tools include clamps.
What is the minimum investment a hobbyist needs to make in order to get started?
To start your own woodworking company, you will likely need capital to purchase the necessary tools and other supplies. You can start by purchasing a small table saw and drill press as well as a circular saw, circular saw, jigsaw and sanding machines. These items aren’t too expensive so you won’t have to break the bank.
What kinds of woods are good for making furniture?
Woods are classified based on their hardness. Softwoods include pine, fir, cedar, and cypress. Because they are resistant to rot, softwoods are often used as outdoor furniture. The hardwoods include teak, maple, mahogany and oak. They are generally indoors as they don't weather well outside.
How can I keep my shop organized?
Setting aside an area to store tools is the first step in keeping your workshop organized. Your tools will stay sharp and ready to go when they are free from dust and debris. Use pegboard hooks to hang tools and accessories.
What amount of money do I need to get started with my business?
Each project is unique so there aren’t exact numbers. These factors will help you get an estimate of how much money is needed.
-
Material costs
-
Tools and equipment
-
Time spent on the project
-
The hourly rate
-
How much profit can you anticipate to make
-
Whether you plan to hire help
For those just beginning, it may be a good idea to start small with simple items like boxes and picture frames. You'll become more proficient as you get experience.
How long does it take you to finish a piece?
It depends on the size and condition of the furniture. Smaller projects like boxes and picture frames can be finished within one day. Larger projects, such as desks and dining tables, can take several days. It takes time for the wood to be stained and sealed properly.
Statistics
- Most woodworkers agree that lumber moisture needs to be under 10% for building furniture. (woodandshop.com)
- In 2014, there were just over 237,000 jobs for all woodworkers, with other wood product manufacturing employing 23 percent; wood kitchen cabinets and countertop manufacturing employing 21 percent. (theartcareerproject.com)
- If your lumber isn't as dry as you would like when you purchase it (over 22% in Glen Huey's opinion…probably over 10-15% in my opinion), then it's a good idea to let it acclimate to your workshop for a couple of weeks. (woodandshop.com)
- Woodworkers on the lower end of that spectrum, the bottom 10% to be exact, make roughly $24,000 a year, while the top 10% makes $108,000. (zippia.com)
External Links
How To
How to join wood with no nails
Many people love woodworking. You can make useful items from wood with your hands, which is both relaxing and fun. Sometimes you may want to join two pieces together of wood without using nails. This article will explain how to do this so that your woodwork projects stay beautiful.
Before you can join the wood pieces together, you need to remove any rough edges. You don't want to leave sharp corners that could cause problems later on down the road. Once you've done this, you're ready to start gluing your boards together.
If you are working with hardwood, only one side should be glue. For softwoods like cedar and pine, glue should be applied to both sides. Press the boards down until the glue is fully incorporated. Before you proceed to the next step, be sure to let the glue dry completely.
After you've glued your boards, you'll want to drill holes into the joints where you plan to insert screws. Depending on the type of screw that you use, the size of these holes will vary. If you plan to use a 1/2 inch wood screw, drill a hole at least 3/4 inches in depth.
Once you have drilled the holes, the next step is to drive your screws through the joint into the board's backside. You should be careful not to touch the board's front surface. This could cause damage. Avoid hitting the screws' ends too often when driving screws. This will help prevent splitting of the end grain.
After your project is completed, you will need to protect it from the weather. You can either seal the entire piece of furniture or cover the top. You'll want a product that lasts for many years. Examples include oil-based varnishes and polyurethanes, shellac, lacquer and others.
These products can generally be found in any home improvement shop. It is important to ensure that you purchase the correct product for the job. Also, remember that some finishes are toxic and should never be used indoors. Always wear protective gear when handling any of these finishes.