You will need to research which woods are best for carving your walking sticks before you begin. Also, you will want to be familiar with the different techniques of whittling. David Allen used these techniques to carve his walking sticks. A few famous quotes about walking sticks are also available. These tips will help you make the perfect walking stick. Read on to learn more. Now you can carve a walking stick that will be a unique, functional piece of art!
Woods that are suitable for carving a walkingstick
Finding a straight piece of blank to carve is the hardest part. There may be a few branches that are too bent to be of use, but it is worth searching until you find one. You should harvest straight branches in the winter, when sap travels between the branches and roots. This makes the wood less likely to split and more stable. It's okay to harvest wood while the tree's still green if you cannot wait until spring.
For carving a walkingstick, you can choose from several species of wood. North American chestnut is a strong wood. Its density makes it ideal to make walking sticks, and other similar tools. The wood grain in this species is often open or slightly closed. This makes it a sturdy walking stick that feels stable and smooth. It is also extremely attractive and is often used in carve. Some species can even be carved with the bark in place.
How to make a walking stick
There are some basic steps to carving a walking stick. First, you should choose a piece of wood with a unique texture. Some woods have distinct bark patterns and colors while other woods have natural twists. You can enhance these features with lacquer or paint. To make it look more appealing, you could also carve the wood shaft. You should ensure that your stick is straight and free from branch shoots or tough spikes.
This book will teach you about different wood types and carving styles. Most common are snakes and Lions. There are many realistic designs you can create, including snakes and fish. Many people consider the talents of these artists divine. This book can be used by both novice and advanced carvers.
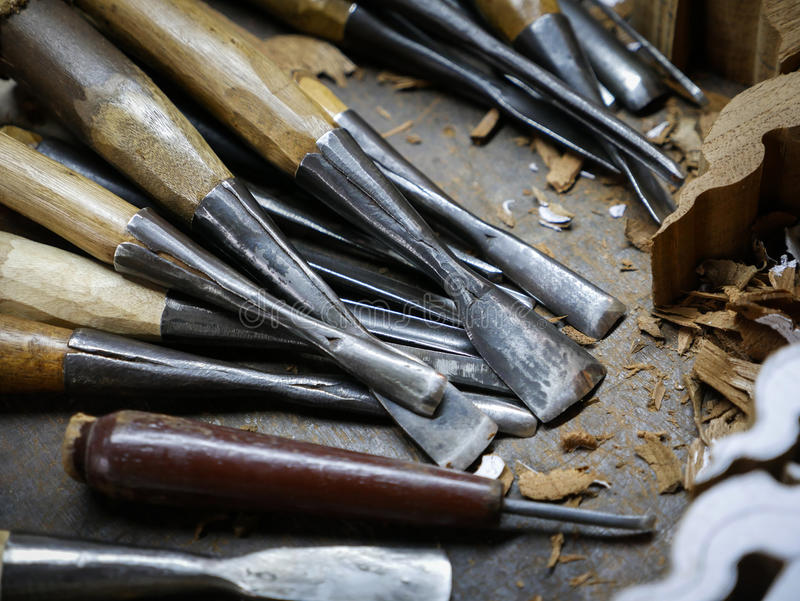
David Allen uses the following tools for carving a walkingstick
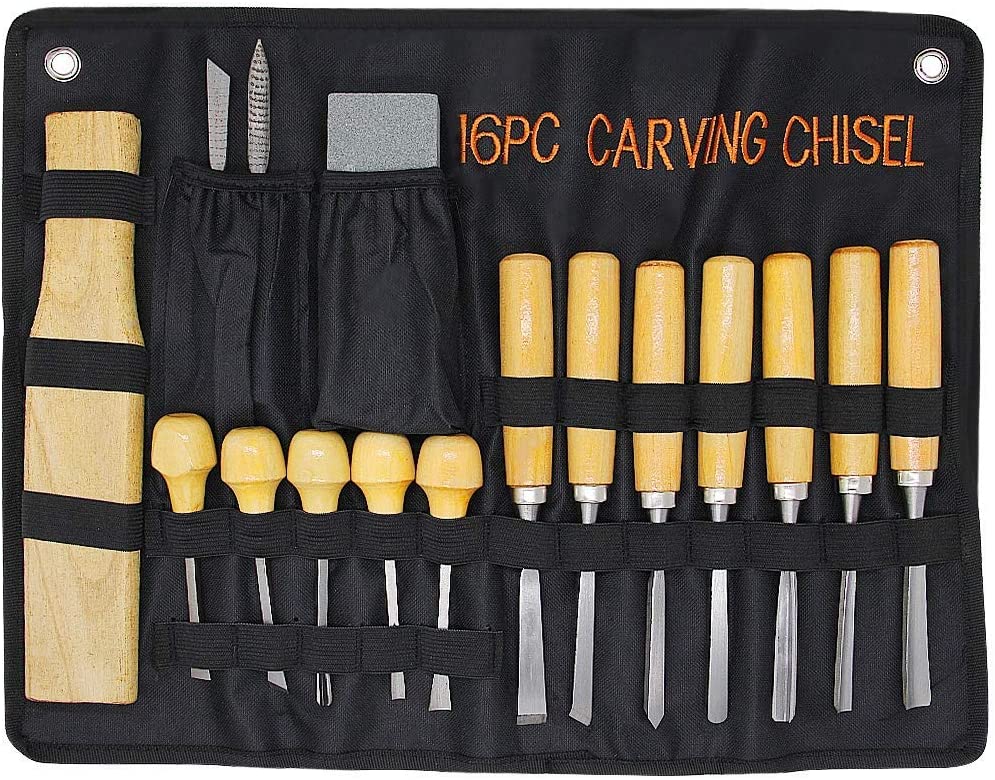
David Allen, as a young boy began making toys using a pocketknife which he found underneath his house. It was too dangerous for him to use as a knife and he had it hidden from his family. His creations included toys, like slingshots, as well as utilitarian tools like shoeshine cases. Allen was 15 years old when he became disabled and started carving walking sticks. Allen used a pocketknife as well as a chisel for carving the wood.
Allen developed his designs independently, digging around the roots of saplings and deciding on what to carve. Allen believed that a design must "see" itself before it can be carved. This process reminded him of the work of many African American artists. Allen often had visions and dreams for the design he wanted. He was able create a stick which would invoke the emotions and feelings in his community.
Famous quotes about carving walking sticks
Carving a walking stick requires complex skills and a solid blank. This is the most challenging part of the whole project. There are many options for where to get your stick. However, you need persistence to find the right one. It may appear bent beyond practical use, but keep searching until you find one. Try to cut your stick when the sap is flowing from branches to root. Sap makes wood more flexible and less likely to break.
The wood's texture, color and grain are important considerations when selecting wood. Every piece of wood is unique and has its own texture. You can enhance the natural swirls by applying lacquer. You want a smooth finish so make sure to remove any branches shoots or spikes from the shaft. This will simplify the whole process. You should consider what type of finishing you will use, regardless of the material.
FAQ
How does a beginner woodworker earn money?
Many people are beginning to learn how build furniture to launch an online business. However, if you're just getting into furniture building, there are other options than selling on Etsy. You can sell at local craft fairs. A workshop could also be offered for people who are interested to learn how they can build their own furniture. You might be able to offer services like remodeling homes or making custom pieces for clients if you are a skilled carpenter.
Is it possible to refinish your own furniture?
Yes! You don't have to hire a professional to refinish furniture. There are many ways you can do it yourself. Here are some suggestions:
Sandpaper can be used to remove stains and scratches. Next, wipe the surface clean with a damp cloth.
Clear polyurethane varnish should be applied. Allow to dry thoroughly before moving furniture.
Paint furniture with acrylic paint.
Instead of using paint, stain is a better choice. You can give your furniture a rich appearance with stain.
Use shellac wax. The wax will add shine to the wood and protect it.
Which wooden items are very popular?
The best-selling wooden items are those which have been made from wood that was harvested sustainably.
Maple, cherry, mahogany walnut, teak, mahogany and maple are the most common woods for furniture.
These woods are extremely strong but also have beautiful colors and grain patterns. They are also very durable if properly maintained.
Wooden furniture should always be painted first to protect against moisture damage. This applies to all surfaces including drawers, doors, handles, and handles.
Choose a paint with water resistance if you want furniture to last as long possible.
It is recommended to use an oil-based primer, then apply two coats. Depending on how often it will be worn, you may need to apply several coats.
Avoid spray cans and aerosol paints. These products have solvents that evaporate quickly, leaving behind dangerous fumes.
Where can you find free woodworking blueprints?
For free woodworking blueprints, you don’t need to read any magazines or buy any books. You only need to Google search. Search Google for "free woodworking" to see hundreds of sites that provide free plans.
What's the difference between a hobbyist and a professional woodworker?
Hobbyists enjoy making things out of wood, whereas professionals focus more on the quality of their work. Hobbyists take great pride in their creations, and share them with family and friends. Professionals spend hours researching design ideas before starting to work on a project. They will meticulously plan every detail of their work from choosing the right materials to finishing it.
Statistics
- The U.S. Bureau of Labor Statistics (BLS) estimates that the number of jobs for woodworkers will decline by 4% between 2019 and 2029. (indeed.com)
- The best-paid 10 percent make $76,000, while the lowest-paid 10 percent make $34,000. (zippia.com)
- Overall employment of woodworkers is projected to grow 8 percent from 2020 to 2030, about as fast as the average for all occupations. (bls.gov)
- Most woodworkers agree that lumber moisture needs to be under 10% for building furniture. (woodandshop.com)
External Links
How To
How to join wood with no nails
Woodworking is an enjoyable hobby. Woodworking is a relaxing hobby that allows you to use your hands to create useful things from wood. Sometimes you may want to join two pieces together of wood without using nails. This article will explain how to do this so that your woodwork projects stay beautiful.
Before you can join the wood pieces together, you need to remove any rough edges. You don't want to leave sharp corners that could cause problems later on down the road. Once you have done that, you can begin gluing your boards together.
If you are working with hardwood, only one side should be glue. If you're using softwoods like pine or cedar, you should put glue on both sides. Apply the glue to the boards and press them down until they are securely attached. After applying the glue, let dry the boards before proceeding to the next stage.
After you have glued your boards, drill holes where you want to insert screws. These holes will differ depending on the type and size of screw you are using. If you are going to use a half-inch wood screw, you will need to drill at least 3/4 inch deep.
After drilling the holes, you can drive the screws into your board's backside. Be careful not to hit the front surface of the board, or else you'll ruin the finish. When driving the screws, try to avoid hitting the ends of the screws too much. This will prevent the wood from splitting.
Once your project is complete, it's time to protect it against the elements. You have two options: seal the whole furniture piece or just the top. You'll want a product that lasts for many years. There are many options: oil-based varnishes; polyurethane; shellac; lacquer.
These products can generally be found in any home improvement shop. It is important to ensure that you purchase the correct product for the job. Don't forget to keep in mind that some finishes are toxic. So, always wear protective gear when handling them.