
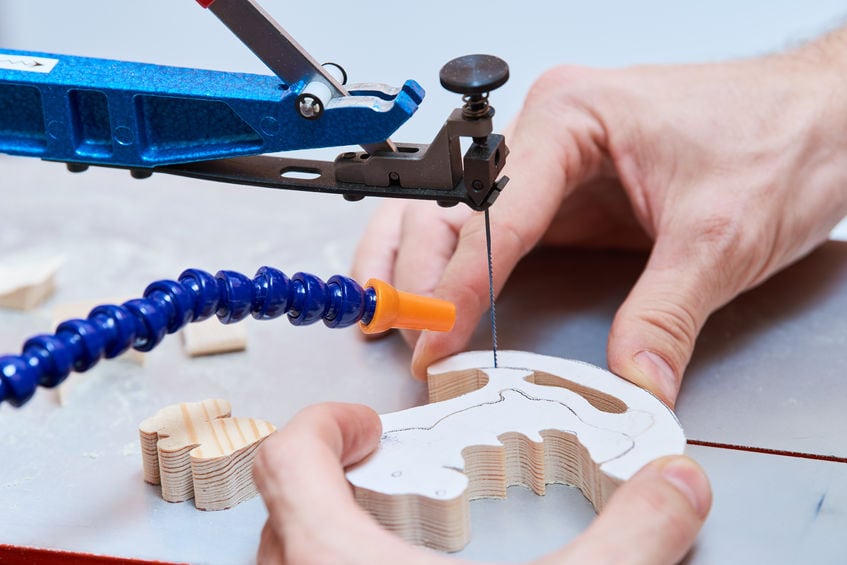
Scroll saw projects are a great choice. There are hundreds of scroll saw projects to choose from. Make a Santa mobile, or a wooden nativity. You can also make coasters or intarsia objects. Scroll saws make great tools for your home. These ideas will help you get the most out of your scroll saw. Be careful when you cut wood.
Make a Santa mobile
If you're a whiz with a scrollsaw, making a Christmas mobile is an easy project to try. Start by cutting out two stars. You will need to cut two stars. One star should be pointed and one should be indented at its base. You can attach these pieces using coiled steel. Afterwards, you can paint them to match. After that, let them dry for several days.
How to make a wooden nativity
Make a Nativity scene for your home with this easy DIY project. Download the scrollsaw nativity template at i.pinimg.com. Follow the instructions to create this wooden nativity set. The Nativity scene when completed will look fantastic in any room. This is an exceptional gift for children. This tutorial will take you through the entire process of creating this Nativity scene.
Making coasters
Scroll sawing involves a complex process. Making coasters using your own saw is not an easy task. Scroll Saw projects appear easier than they really are because of their precise patterns. Just follow these steps to make your coasters. Be sure to allow enough time to finish the project. Here are some tips for making coasters with your Scroll Sawer. And remember that this project will require a lot of patience and attention to detail.
Intarsia
Planning your cuts correctly and using the right technique are key to a successful scroll saw project. Make sure you get a clean cut. You can find intarsia patterns online if you don't know how to cut it. Scroll saws are precise and require accurate measurements. You should also study the grain patterns before you start cutting. Always make sure that you are cutting squarely, so that you can see the pattern line. You won't have to scrape expensive wood by using a foot switch. Another option is to deburr your pieces before you cut them. Double-sided tape can also be used with sanding pads and shims to smoothen transitions. This will prevent any sharp bits or edges from being removed.
Make a switch topper
A scroll saw can also be used to turn boring wood into an attractive change plate. Scroll saws can be used to cut complex patterns from simple to complicated and create intricate designs. If you're a beginner, it's a good idea to start with a simple project, such as a frog-shaped switch plate. Online scroll saw plans are available. Print them off for future reference.
Making corbels
The best thing about corbels made with scrollsaw projects? They are so simple to make! You can easily add decorative touches to your home with this easy project. Corbels are possible for kitchens, bathrooms, and any other space. You can make vintage corbels with a little bit of time if you want! This will add style and protection to your home from income tax auditors.
Making a puzzle out of pictures
You can create a picture frame with scrollsaw projects using the same steps as for other crafts. First, you need a piece of 1 x 8 pine wood. After you've cut the piece out, you can cover the piece with painters tape or spray adhesive to make it easier to peel away. The puzzle pattern can be cut once you have completed the cutting. Spread it out with your fingers to make the puzzle pieces fit together.
Make a jigsaw
Make a jigsaw by scroll saw. Many jigsaw puzzles are interlocking, which means you can move the pieces without disturbing them. You will need to pick pieces with matching features in order to create a scrollsaw. You can either search for a pre-existing jigsaw puzzle online or in a book to find one that matches your design.
FAQ
What is the minimum investment a hobbyist needs to make in order to get started?
To start your own woodworking company, you will likely need capital to purchase the necessary tools and other supplies. The best place to start is by buying a small drill press, circularsaw, circular saw or sanding machine. These items are affordable so you won’t break the bank.
How can I learn basic woodworking skills
The best way to learn how furniture construction is to make your own bench. This project can be completed with whatever wood you have available at home. If you are unsure what type of wood is best, you can get cheap pine boards at Lowes (or Home Depot) instead. Once you have built your bench, you will need to sand it off and then finish it with a stain/varnish.
What tools should you start with to become a woodworker
Woodworking takes practice and patience. It takes time and practice to master the various techniques and tools required for woodworking.
There are many different types of woodworking equipment available on the market today. Some people prefer to use power tools while others prefer manual tools.
Your choice, however, is up to you. However, you need to ensure that the tool you use is the right one for the job. It may be a good idea to start with a basic set, if possible, if you don’t know much about hand tools.
You might also want to learn how a router works, which allows you to cut wood into intricate shapes. You can find these at most hardware stores.
How do I identify the type of wood that I am dealing with?
When purchasing wood, always check the label. The label should contain information about the wood species, its moisture content, and whether it has been treated with preservatives.
Can I succeed in woodworking if I'm a genius?
No. Woodworking is not difficult. To create stunning works of art, anyone can learn to use basic power tools.
Statistics
- Woodworkers on the lower end of that spectrum, the bottom 10% to be exact, make roughly $24,000 a year, while the top 10% makes $108,000. (zippia.com)
- Most woodworkers agree that lumber moisture needs to be under 10% for building furniture. (woodandshop.com)
- Overall employment of woodworkers is projected to grow 8 percent from 2020 to 2030, about as fast as the average for all occupations. (bls.gov)
- The best-paid 10 percent make $76,000, while the lowest-paid 10 percent make $34,000. (zippia.com)
External Links
How To
How to stain wood
Staining wood can be described as a process where chemicals are applied to the wood surface. This causes the wood to take on a new color. This chemical reaction causes wood to turn from whiteish to brownish. The most common type of wood used for staining is oak, although many other types of wood can be stained.
There are many ways to stain wood surfaces. Mixing the stain in a solvent such as turpentine and spraying it onto the wood is one method. Another method involves applying a solution of water to the wood. It is possible to mix stain into varnishes and paints, making it part of the finishing coat.
Preparing your wood for staining is the first thing to do. You must clean the wood well to remove any grease or dirt that might interfere with the application of the stain. Sanding smoothens any scratches or rough spots. Then you must decide what kind of stain you want to use. There are two main kinds of stains available: non-penetrating stains and penetrating. Penetrating stains penetrate deeper than non-penetrating stains, which makes them great for dark colors like mahogany. Light colors such as maple work well with non-penetrating stain.
You will need to decide on the type of stain you want to use, and then prepare your tools. The best tool for applying stains is a paintbrush. It allows you to evenly distribute the liquid over the surface. A few rags are also handy to clean up any spillages after you have finished painting. If you are planning to mix your stain, ensure you have enough containers for each component.
Once you have prepared all your materials, it is time to clean the areas where you will stain the wood. To remove dirt and dust, use warm water and soap. Use a dampened rag and clean water to wipe the furniture. Be sure to get rid of all loose material, especially if staining is planned for darker wood.
Apply the stain. Next, apply the stain to the furniture by starting at one end. Move slowly and carefully along the grain of your wood until you reach its opposite end. Keep the stain from dripping off the wood's surface. Allow the stain to dry completely before you move on to the next step.
Clear polyurethane is used to protect the painted surfaces. Three coats of polyurethane sealing agent are required. Allow the third coat of polyurethane sealer to dry overnight before applying the final coat.