
It is important that you properly tension your band saw blade before you begin to set it up. There are many ways to make your cut. Follow these steps to setup a band saw and you will soon be cutting! Listed below are some tips that will help you maximize your band saw's potential. They may be difficult to follow at first, but they're definitely worth it in the end.
A tension meter is used to set up a bandsaw
The best way to ensure consistent blade tension is to use a tension tester. Read the manufacturer's instructions before you begin to cut wood. These instructions can vary depending on which model you have. Turn the tensionwheel down 1/4 to 1/2 turn. Once you have done this, you can adjust the FSR of your blade guides.
To check the tension of your bandsaw blade, you can deflect it and listen for a sound. A tension meter is a costly and precise tool that allows you to adjust the blade tension to achieve maximum blade life. While a tension meter might cost you $400 or more, it is definitely worth it. A tension meter is not something you should be afraid of buying. You can use a gauge to check your blade tension.
Use a gauge to measure blade tension
Setting up a bandsaw is crucial. Every blade needs the same tension to function properly. The pulling force (generally between 200 and 800 lbs) will affect the tension. If you don’t own a bandsaw’s tension scale, it will give you an incorrect reading. So what are you supposed to do?

A bandsaw gauge is made up of two stainless-steel plates that pivot between them and are connected by tension springs. One plate features a numeric scale, while the other has a pointer indicator. The gauge clips to your blade using three pins. Two pins sit on either side of the blade and the third pin presses against the blade on the other.
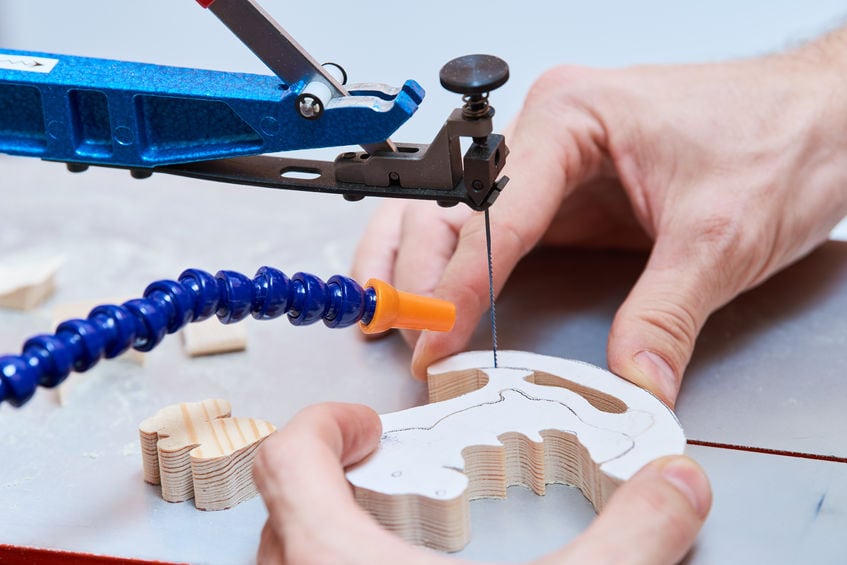
Tracking a blade
Proper blade setup is crucial for achieving quality cuts. It is essential to track the blade properly and adjust its height accordingly. Adjust the blade height so that there is approximately one-eighth - quarter-inch clearance between the material and the blade. Excessive vibration and friction can lead to a deviation in the course of a line, so don't set your blade too high or low. Tracking knobs can be used to stabilize wobbling knives.
First, locate the blade. The blade should be positioned on the crown of your wheel. Its deepest part is in the middle of the gullet. Next, apply tension to the blade. The tracking control is usually located at back of the saw. You should apply tension to the blade. After you are satisfied that the blade is in the right position, make sure to lock it. Once you have the blade in place, you can cut.
You can reduce drift by using a long blade
A band saw's long blade should be located near the center of its crown. The blade should not be too close either to the front or rear edges of the wheel. A typical blade will not be too far off center by about an eighth to quarter of an inch. However, if the blade is barely touching the wheel it may need some adjustments. Adjust the fence and tilt your upper wheel to fix this.
It is important to have the same toe-out angle for the band saw blade as you are cutting to reduce drift. This will minimize drift, which is material that is lost when a woodcutter begins cutting the first lumber slice. In the video below you will see one method to properly set the fence angle. You can also duplicate the fence angle with a jig.
Using a fence to align the blade
The alignment of the blade on a bandsaw is simple by using a fence. To make sure the blade is parallel with the fence, place the fence on the sidewall of the band saw closest to the fence. Next, slide the fence across the miter slot until it is flush with its face. You may also be able to use a finger to feel along the miter slot to ensure the blade is aligned properly.
Before adjusting the fence, you must set the blade guides. The band saw must be correctly set up. The fence must be placed with a sharp edge. Adjusting the fence should be done if the blade moves. A jig, or bevel square, can be used to measure the drift angle. This video will demonstrate how to do it. You must first determine what fence is causing the drift.
FAQ
What should a woodworker be paid per hour?
The hourly rate of a professional woodworker depends on many factors including experience, skill level, availability, location, etc.
An average hourly rate for skilled woodworkers ranges between $20-$50.
A less skilled woodworker might charge as low as $10 per hour.
What kind of wood should you use?
Woodworking is a popular job that involves oak, pine and maple. Each wood variety has distinct characteristics that influence the final product's look and feel. Oak is a darker wood and tends to be more durable than other types. Birch is soft and light, and mahogany is denseer and heavier. You also have the option of solid wood or veneers. Veneers can be described as thin sheets of wood that have been glued together in one layer.
Can I refinish furniture that I make?
Yes! There are many options for refinishing furniture that you don't need to hire a professional. Here are some suggestions:
Use sandpaper on the surface to remove any stains or scratches. Finally, use a clean cloth or sponge to clean the surface.
Apply clear polyurethane varnish. Allow to dry completely before moving furniture.
Use acrylic paint to paint furniture.
Instead of painting, use stain. Furniture will look richer with the stain.
Use shellac wax. Applying wax will give the wood shine and protection.
Statistics
- If your lumber isn't as dry as you would like when you purchase it (over 22% in Glen Huey's opinion…probably over 10-15% in my opinion), then it's a good idea to let it acclimate to your workshop for a couple of weeks. (woodandshop.com)
- The best-paid 10 percent make $76,000, while the lowest-paid 10 percent make $34,000. (zippia.com)
- Average lumber prices rose about 600 percent between April 2020 and May 2021. (familyhandyman.com)
- Woodworkers on the lower end of that spectrum, the bottom 10% to be exact, make roughly $24,000 a year, while the top 10% makes $108,000. (zippia.com)
External Links
How To
Tips on how to drive a nail in wood
The first step in driving a nail into wood is to choose the correct size and type of hammer. The most commonly used types of Hammers are claw hammers. Each type of hammer comes with its advantages and disadvantages. For example, a claw hammer works best when you want to hit something hard, like nails; however, it's difficult to control precisely where the blow lands. A sledgehammer is great for hitting large areas at once, but it's too heavy to use effectively for smaller tasks.
Once you have chosen the right hammer for you, put your hand flat against its side so that it rests comfortably in the palm of your hand. Grip the handle firmly, but don't squeeze it so tightly that you hurt yourself. Your wrist should be relaxed while you hold the hammer straight upwards. Now, move the hammer towards the center of the nail by swinging it back. You should feel the impact on the nail from the hammer. Try practicing with a block to help you master the art of swinging a stick.
When you're ready to start driving the nail, hold the hammer in front of you close to your body. You will need to position the nail so it is parallel to the wood. Keep your attention on the tip. Then, swing the hammer forward. Next, follow the motion of your hammerhead. This can be repeated several times to increase the speed of your swing. When you are confident with the technique, add power to your swings. Then, raise the hammer from your shoulder to bring it down. This way, you'll be able to put more energy behind your blows.
Once you've made the first nail hole, take out the hammer. To remove the remainder of the nails, you can use a screwdriver/pry bar. To avoid splitting the wood, make sure the nail heads are not touching the board's surface.