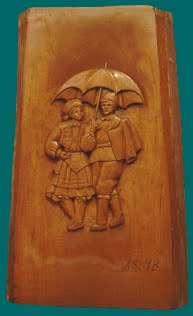
If you are interested in trying your hand at woodcarving, there are several designs available to you. These patterns can be printed out, which makes the whole process easier for you. Beginners can start out with geometric patterns. Once they get the hang of carving, they can move on to other patterns, like flowers and animals. In this article, we'll look at several examples of woodcarving patterns. The following are some of the most useful patterns for woodcarving.
Detailed Engraved Flower by Fine Woodworking by Dremel
If crafting is your passion, the Detailed Engraved Flower (Finewoodworking by Dremel) might appeal to you. These rotary tools are often called Dremels and are great for detailing and engraving. These tools are very easy to use. Just set the speed dial and press a button near the head of the unit. When carving a wood surface, the speed dial will dictate how much material the tool can remove.
Frank C. Russell Detail Engraved Floral
The "Detailed Engraved Flower By Frank C. Russell" has been reproduced both nationally and internationally. Russell's early work was heavily influenced by first-hand observations, even though his output was not completely documentary. His later works combine secondhand and fictionalized information. They are, rather, representations of a life that is part myth and part fact, with no definitive proof of the narrator.
His earliest work, "Detailed Engraved Flower" by Frank C. Russell, is a great example of his skill. This tiny work, which dates back to 1911, is made of an ivory grip and a bull's skull. The image measures just a few millimeters. This is the work of artist as a tribute for his mother who died before him.
Detailed Engraved Flower by Tumbled Rose
Detailed Engraved Flower by Tumbling Rose is a beautiful wood carving pattern. Although it looks simple, this flower actually has intricate petals. It is an excellent project for novice carvers due to its intricate details. These stock photos only show part of the engraved floral design. It is possible to find a few that work better than others. Tumbled Rose has a wide range of sizes for detailed engraved flowers, from large to small.
FAQ
Is there a way to start my own woodworking company?
It can be difficult to start your woodworking business. You will need to adhere to many legal requirements. This doesn't necessarily mean that you should go through all the work of setting up a company. Many people prefer to join existing companies. This will allow you to avoid paying membership fees and taxes.
You can learn how to woodwork.
Doing is the best way to learn any subject. Woodworking is an intricate art form that requires practice, skill, patience, and experience. Every craft takes practice and patience.
The best way to learn how to do something is actually to do it. Start small, and work your way up from there.
What is the hourly rate for a woodworker?
The hourly rate for a professional woodworker varies depending on many factors, including skill level, experience, availability, location, and other variables.
An hourly wage for skilled woodworkers is between $20 and $50.
An hourly rate of $10 for a less skilled woodworker could be possible.
Where can you buy hardwood lumber?
You can buy hardwood lumber at Home Depot. They offer a wide range of wood products including flooring, cabinets, furniture and more.
A large variety of engineered hardwoods is available to them, including Ipe (Araucaria Angustifolia), Brazilian Cherry and Peau d'Arco.
These woods can also be purchased online by simply searching Google for "hardwood timber"
Can I make my living doing this job?
Yes! Many woodworkers are already doing so. According to the U.S. Bureau of Labor Statistics' (BLS), in May 2012 the median annual wage of woodworkers was $34,000 This is significantly higher than the national average, which is $31,000 per year.
What material would you recommend to start learning woodworking?
Start with softwoods such as pine and poplar. Once you feel comfortable with these two, move on to hardwood.
Statistics
- Most woodworkers agree that lumber moisture needs to be under 10% for building furniture. (woodandshop.com)
- If your lumber isn't as dry as you would like when you purchase it (over 22% in Glen Huey's opinion…probably over 10-15% in my opinion), then it's a good idea to let it acclimate to your workshop for a couple of weeks. (woodandshop.com)
- The best-paid 10 percent make $76,000, while the lowest-paid 10 percent make $34,000. (zippia.com)
- In 2014, there were just over 237,000 jobs for all woodworkers, with other wood product manufacturing employing 23 percent; wood kitchen cabinets and countertop manufacturing employing 21 percent. (theartcareerproject.com)
External Links
How To
Tips on how to drive a nail in wood
The first step in driving a nail into wood is to choose the correct size and type of hammer. The most popular types of hammers include claw hammers as well as mallets and ball peenhammers. Each type of hammer has its pros and cons. A claw hammer, for example, is the best choice if you need to hit nails hard. However, it's not easy to know exactly where the impact will land. A sledgehammer is useful for striking large areas at once but too heavy to be effective for smaller tasks.
Once you have chosen the right hammer for you, put your hand flat against its side so that it rests comfortably in the palm of your hand. Grab the handle tightly, but do not squeeze too hard. Your wrist should be relaxed while you hold the hammer straight upwards. Next, swing the hammer toward the ground and aim for the nail's center. The impact of the hammer hitting the nail should be felt. You can practice swinging the hammer with a block or wood until you feel the rhythm.
You can now drive the nail by holding the hammer to your body. Place the nail so that it is perpendicular with the wood's surface. Keep your eyes on the tip. Swing the hammer forward, and then move the hammerhead. Keep doing this until you are comfortable with the swing. Once you've mastered the technique, try adding power to your swings. Try holding the hammer above your shoulder and bring it down forcefully. This will help you put more energy behind each of your moves.
Once you have successfully drilled the first hole in the nail, remove the hammer. To remove the remainder of the nails, you can use a screwdriver/pry bar. You should ensure that the nails are flush with the board's surface to avoid splitting the wood.