A beginner woodcarver might not know where to begin. Here are some tips and tricks to help you get started with your first animal carving job.
Dog
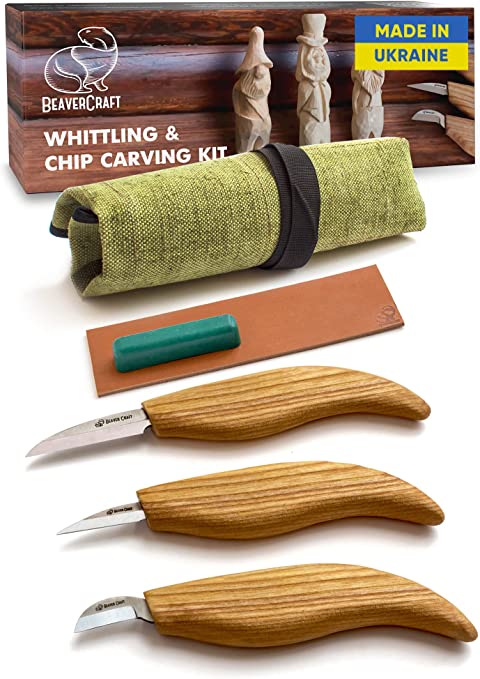
If you are an aspiring woodcarver, you will definitely benefit from the numerous free dog wood carving patterns available online. These patterns will guide you in carving your dog in a variety of styles and dimensions. Here are some of the tools you will need to carve your dog. A band saw or the coping saw are necessary, along with chisels, mallets, and time to polish. After that, you are ready to start carving.
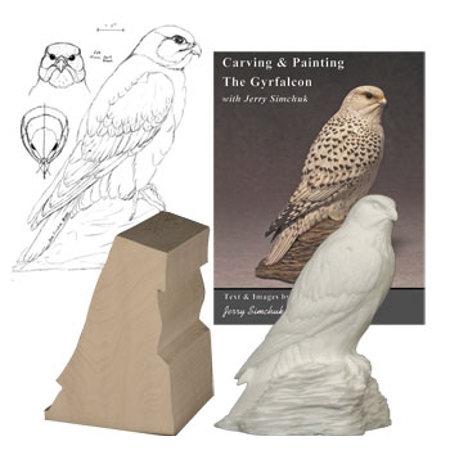
Eagle
Native Americans regard the baldeagle as a traditional symbol for strength, courage, wisdom, and perseverance. Its primary purpose was to be the creator's messenger. It measures approximately 20 inches in size and 5 inches wide. Wood carvings of the eagle are very popular today. There are many options for carving eagles from antique to modern woods. This article will highlight popular wood carving techniques.
Bear
Carving a bear is simple and straightforward. Each line adds weight. For more visual interest, bears have their front paws angled in opposition to the leg lines. For those who are just starting out in wood carving, a book can help you create a bear. James Miller's book illustrates the whole process.
Elephant
An elephant wood carver is a beautiful way to give your home character. 1stDibs sells 56 antique carved wood Elephants and two modern pieces. These pieces are a classic design that dates back to the 19th Century and have seen increasing popularity in recent times. You can choose between Art Deco, Mid-Century Modern and Folk Art styles. A smaller piece can be added to your home to add a subtle accent.
Moose
A moose is a wonderful animal to wood carve, whether you are looking to add antlers and/or create a stunning moose head. Dowels can be used to attach antlers or paddles to moose. Push them in, or glue them in. After that, you can paint the moose with a walnut gel stain or use paint to color the moose.
Template for moose
A moose carving templates helps carvers to create realistic-looking carvings. You can paint moose carvings or stain them with walnut gel. After learning the basics of carving this animal, it's not difficult. You can add details like fur or eyes with a brush, or a typhoon piece on a diegrinder. The Moose template is ideal for beginner wood carvers who want to carve an animal.
Bear template
You will need a template to start a bear wood carving. You can then use a Dremel instrument to examine the wood features. Stop cuts can then be used to separate the legs of the lower body with this tool. You can also make small V cut in the legs to indicate their split. You can then round the underbelly after you have completed the leg and ear parts. Make sure to leave an open space at the back to continue to shape the bear.
Eagle template
Three detailed templates are required to carve an eagle. The first template is used for carving. The second template will serve as a working paper template. It will be cut to create transfer patterns. The third template will serve as a reference. You will then use the available tools to cut out the main lines. Cut the lines so that they are close to the pattern. Make sure that you align all of your marks.
Template for mouse
There are many designs available for wood carving beginners. Using a template will make this task much easier, and there are even printable patterns available to help you along the way. If you're just starting out, you could start with a simple geometric pattern. As you gain experience, you will be able to move on to more complex patterns. Once you have mastered the basics you will be able to create the perfect mouse.
FAQ
Do you know anything more about woodworking?
It is easy to underestimate the amount work involved with furniture construction. Finding the right wood is the hardest part. It can be hard to choose from the many types of wood that are available.
Another issue is that wood does not have the same properties. Wooden can split or crack, while some woods may warp. These things should be considered before you buy wood.
Do I need to be a genius to succeed in woodworking?
No. No. Woodworking isn't rocket science. It is possible to learn basic tools and techniques that will allow you to create beautiful art.
What should a woodworker be paid per hour?
The hourly rate for a professional woodworker varies depending on many factors, including skill level, experience, availability, location, and other variables.
An hourly wage for skilled woodworkers is between $20 and $50.
A less skilled woodworker can charge as low at $10 an hour.
What is the difference in a hobbyist and professional woodworker?
Hobbyists are passionate about making things from wood, while professionals tend to be more focused on the quality and craftsmanship of their work. Hobbyists take great pride in their creations, and share them with family and friends. Professionals will spend hours researching designs and then begin to create a project. They'll pay great attention to details, from choosing the most suitable materials to finishing the work perfectly.
Statistics
- Woodworkers on the lower end of that spectrum, the bottom 10% to be exact, make roughly $24,000 a year, while the top 10% makes $108,000. (zippia.com)
- Most woodworkers agree that lumber moisture needs to be under 10% for building furniture. (woodandshop.com)
- Average lumber prices rose about 600 percent between April 2020 and May 2021. (familyhandyman.com)
- If your lumber isn't as dry as you would like when you purchase it (over 22% in Glen Huey's opinion…probably over 10-15% in my opinion), then it's a good idea to let it acclimate to your workshop for a couple of weeks. (woodandshop.com)
External Links
How To
How to properly use your handsaw
Hand saws can be used to cut wood into small pieces. Most common hand saws include circular saws (jigsaws), table saws and band saws. A hand saw is a tool made from metal or plastic which cuts material such as wood, plastics, metals, etc.
Hand saws have the main advantage of cutting at precise angles without needing to adjust the blade. The blades can also be sharpened easily, which is not possible with power tools. But there are disadvantages. They can be very heavy and bulky so it is important to take care when you transport them. If you are not familiar with how to use one you may injure yourself.
There are many ways that you can use a handsaw. When cutting, you should keep your hands away from the blades. If you don't, you might get hurt. Holding the saw in your hands, place your thumbs on the handle and your thumb at the blade's top. This way, you won't accidentally touch the blade.
You should not place anything underneath the wood you are cutting with a handsaw. Doing this would cause the blade to slip off the wood's surface. Always check the area where you want to cut before starting. Ensure no nails, screws, or other objects are underneath the wood.
When working with a handheld saw, safety goggles are essential. These glasses prevent dust from entering your eyes and make it easier for you to see what's happening. Safety glasses also protect your eyes from flying debris.
You must learn how to safely operate a handsaw before you can use it. After that, practice until it becomes comfortable enough to start cutting. You'll soon be able to cut any item once you have mastered the basics.