
You can find a variety of patterns for a scroll saw on the internet, including many holiday ones. These patterns can also be used to make Santa mobiles, baskets, and even nightlights! Get one now! You can then browse through the hundreds of other patterns that are available to find what you're looking for. Scroll saws can be fun and versatile. Why not try different patterns to make something unique with them?
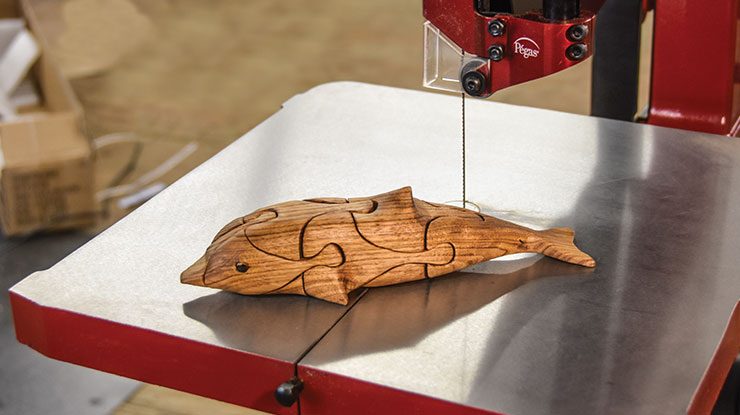
Simple patterns with a scroll saw
The creation of patterns is one of the most important skills a scroll saw beginner should master. There are many patterns to choose from, including those adapted from papercraft and quilting. You can create patterns using high-contrast images to look hand-drawn. Learn how to use your scrollsaw by following these step-by–step tutorials. Many of these patterns can be found in woodworking magazines and publications.
Simple Pattern Projects with a Scroll Saw is a great book for beginners. It contains 28 projects, as well instructions for selecting the correct wood and other supplies. It even includes an area for you to create your own designs. Although it is tempting to just stick to the patterns already in existence, there are still many ways you can start with your scroll saw. You can create a wooden heart, bird or silhouette of a dog, for example.
Creating a Santa mobile with a scroll saw
This Christmas tree-shaped scrollsaw mobile project is fun and requires basic scroll saw skills. Cut out two stars. The red star should match Santa Claus. Once you have cut these pieces, you can make Santa mobiles by making holes in one side and a point on the other. You can attach the mobile to the wire by coiling it.
Scroll saw patterns can also be downloaded, from simple two-piece designs up to complex 3D ones. Scroll saw patterns can be downloaded online at no cost. Some are even printable. Select a pattern to get started. There are so many possibilities. Making a Santamobile with a scrollsaw is a great idea to get started on the holiday season. It is possible to cut several pieces and stack them in order to sell them.
Make a basket using a scroll saw

If you've ever wanted to try your hand at woodworking, making a basket with a scroll saw is an easy way to do it. A simple woodworking skill and the right tools will allow you to create beautiful baskets in no matter how quick you are. You'll be amazed at how easy and fast it is to make a basket using our full-size scrollsaw pattern. What's the best part? You will be able to assemble the new creation in no matter how fast you want.
This book covers the entire process of making a beautiful, functional basket, starting from start to finish. To make baskets you'll need to have a scrollsaw. This book will teach you how to do that. The book is divided into four parts: the base, the rings, and the handle. Each ring will require four 1/16" (2mm), bits, and a #3MGT blade.
Creating a nightlight with a scroll saw
You can create stunning nightlights with a scrollsaw if your woodworking skills are lacking. There are many patterns that you can use to make a nightlight using a scroll saw. These projects are simple to build and are great for showing off your sawing skills. Continue reading to learn how you can make a nightlight out of a scrollsaw.
A scroll saw is a great tool to create intricate curves and shapes. The scroll saw's vertical blade can be swiveled to create curved cuts. Scroll saws are available in many sizes, and can be carried around easily. You can find one that has a patented feature that reduces vibrations, allowing you to work with it without a heavy desk. Many scroll saws feature blade attachments and secure locking mechanisms.
FAQ
How much should a woodworker charge per hour?
The hourly rate for a professional Woodworker will vary depending on many variables, such as experience, skill level and availability.
The hourly average rate for skilled woodworkers runs between $20-$50.
An hourly rate of $10 for a less skilled woodworker could be possible.
Where can I locate free woodworking plans
Free woodworking plans are available online. You don't even need to buy books or magazines. Just search Google. Simply type "free woodworking” into the search box and you'll find hundreds of websites that offer free plans.
Are you looking for tips to start a woodworking company?
Starting a woodworking business is a lot of work. But if you're passionate about your hobby, you won't mind putting in the effort. You'll enjoy the challenge and rewards of owning your own business.
One thing to keep in mind when launching a new venture is that you might encounter unexpected problems along the way. For instance, you might run out of money unexpectedly. Perhaps customers won't pay you as much as you had hoped. You must be ready to deal with such situations in order to survive.
It is a good idea to create a separate bank account just for your company. This way, you'll always know exactly how much money you have coming in.
How do I organize my shop?
To keep your workshop tidy and organized, you should first create a place for tools storage. Make sure your tools are clean and free of debris and dust so they can be used properly. Pegboard hooks can be used to hang tools and accessories.
What kinds of woods are good for making furniture?
Woods can be classified according to how hard they are. Softwoods include cedar, pine, cedar, and Cypress. Because they are resistant to rot, softwoods are often used as outdoor furniture. You can find hardwoods like oak, maple, mahogany, teak, and others. Because they can't weather outside, they're usually used indoors.
Do I have the potential to make a decent living doing this?
Yes! Many woodworkers do. According to the U.S. Bureau of Labor Statistics' (BLS), in May 2012 the median annual wage of woodworkers was $34,000 This is much higher than the national median of $31,000 per annum.
What is the difference between a hobbyist or a professional woodworker, and how can you tell?
Hobbyists love making things from wood while professionals are more concerned with the quality of their work. Hobbyists usually take pride in their creations and often share them with friends and family. Professionals will spend hours looking at designs before they start to build a project. Professionals will be meticulous about all aspects of their work, from selecting the right materials to finishing it.
Statistics
- Woodworkers on the lower end of that spectrum, the bottom 10% to be exact, make roughly $24,000 a year, while the top 10% makes $108,000. (zippia.com)
- Most woodworkers agree that lumber moisture needs to be under 10% for building furniture. (woodandshop.com)
- In 2014, there were just over 237,000 jobs for all woodworkers, with other wood product manufacturing employing 23 percent; wood kitchen cabinets and countertop manufacturing employing 21 percent. (theartcareerproject.com)
- The U.S. Bureau of Labor Statistics (BLS) estimates that the number of jobs for woodworkers will decline by 4% between 2019 and 2029. (indeed.com)
External Links
How To
How to stain wood
The process of staining wood involves the application of chemicals to the wood's surface, which causes it to change its color. This chemical reaction changes the wood's color from white to brownish. While oak is the most widely used type of wood for staining purposes, other types of wood are also available.
There are many methods to apply stain to wood surfaces. One method involves mixing the stain and a solvent and then spraying it on the wood. Another method involves applying a solution of water to the wood. It is possible to mix stain into varnishes and paints, making it part of the finishing coat.
Preparing the surface for staining wood is the first step. To apply the stain, clean the wood completely. Sanding the wood removes scratches and imperfections. The next step is to determine the type of stain you would like to use. There are two types of stains that can be used: penetrating and non-penetrating. Penetrating and non-penetrating wood stains penetrate deeper than other types, making them perfect for dark colors like mahogany. Penetrating stains are best paired with lighter colors, such as maple.
After choosing the type and application method you prefer, gather your tools. The best tool for applying stains is a paintbrush. It allows you to evenly distribute the liquid over the surface. It is a good idea to have rags on hand in case you need them to clean up any stains that may remain after you have finished painting. If you are planning to mix your stain, ensure you have enough containers for each component.
After you have prepared the materials, you can clean the area where you want to stain the wood. Use soap and warm water to remove dust and grime. Wipe the entire piece of furniture with a rag dampened with clean water. Take care to remove all debris and dirt, especially if you are planning on staining darker wood.
Next, spray the stain. The stain can be applied by spraying or brushing the stain onto one end of the furniture. Move slowly and carefully along the grain of your wood until you reach its opposite end. Make sure that the stain does not drip off the edge of the wood. Let the stain dry completely before proceeding with the next steps.
Clear polyurethane is used to protect the painted surfaces. Apply three coats of polyurethane sealer. Let the third coat dry overnight before you sand the final coat.