Round carbide inserts can be square or slightly rounded. However, both can be useful cutting tools. For quick removal of heavy materials, square cutters are best. Round inserts can also be used for finishing. Round cutters, on the other hand, remove material nearly as well as square-edged cutters, and are best suited for final finishing cuts. Read on to learn more about each type. These tips will help you choose an appropriate round carbide insert for the lathe.
Parting tools
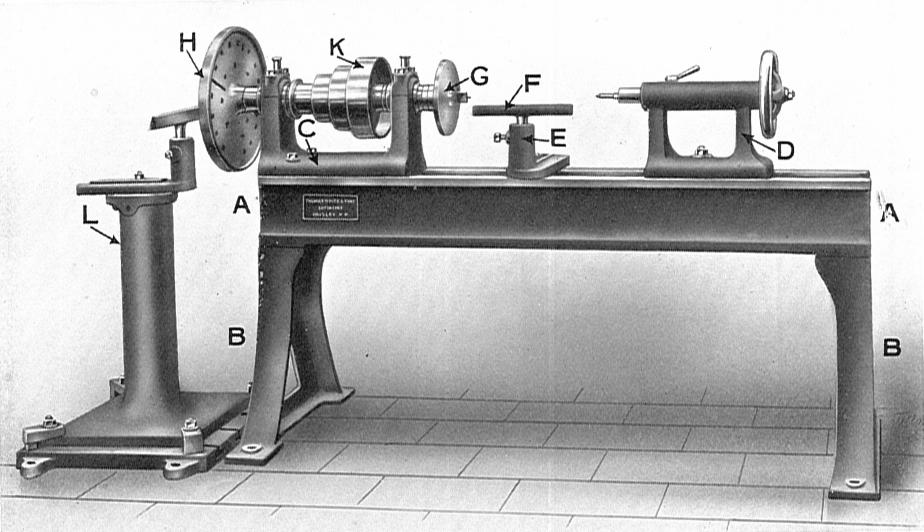
Round carbide lathe parting tools have many advantages. Parting tools have a wide body that provides stability at the base of the tool shaft. The cutting section is also narrower, producing a 1/8" width cut. Parting tools made of carbide last longer than those made from high-speed steel and are easier to use. Slowly move the cross-slide crank of your parting tool until it starts cutting. Continue to move the cross-slide turn until a straight line appears on the workpiece. Keep the tool at the same speed until it is finished.
Carbide inserts come in many sizes and styles. These tools are usually made from HSS or tungsten caride. HSS is usually less expensive and lasts longer than tungsten carbonide. Tungsten carbide is stronger and can tolerate higher temperatures. The carbide inserts must be replaced if they become damaged. It is easy to do this if you order on eBay. To avoid having to re-grind carbide, it should be regularly replaced.
A round carbide lathe tool should be used correctly if the end is perfectly square when it's placed in the center of the workpiece. Otherwise, it could leave a large pip on the workpiece. To avoid this, grind your right end of the tool so that it forms points. The right end will tend to move to the right, but the tool will cut cleanly. Once you have positioned the tool properly, place its tip against the jaw.
Chamfering tools
Chamfering is an important operation performed in almost every piece of machined component. Tool steel is used to make chamfering tools. They can be indexed. They come in a range of sizes, angles, and flute counts. The angle of chamfering cuts is determined by the angle of cutter body. The 45-degree chamfering tool is one of the more popular options. This tool can be accommodated on a round carbide lathe fitted with a square chuck.
A carbide-chamfering tool can be used to make threads from bolts, nuts, and any other metal object. The tool works by grinding a cutting edge on one side at an angle to create a smooth surface. The cutting edge of a Chamfering tool's cutting edge is not straight like standard turning tools. The tool's cutting edge is similar to a left-hand external turning tool.
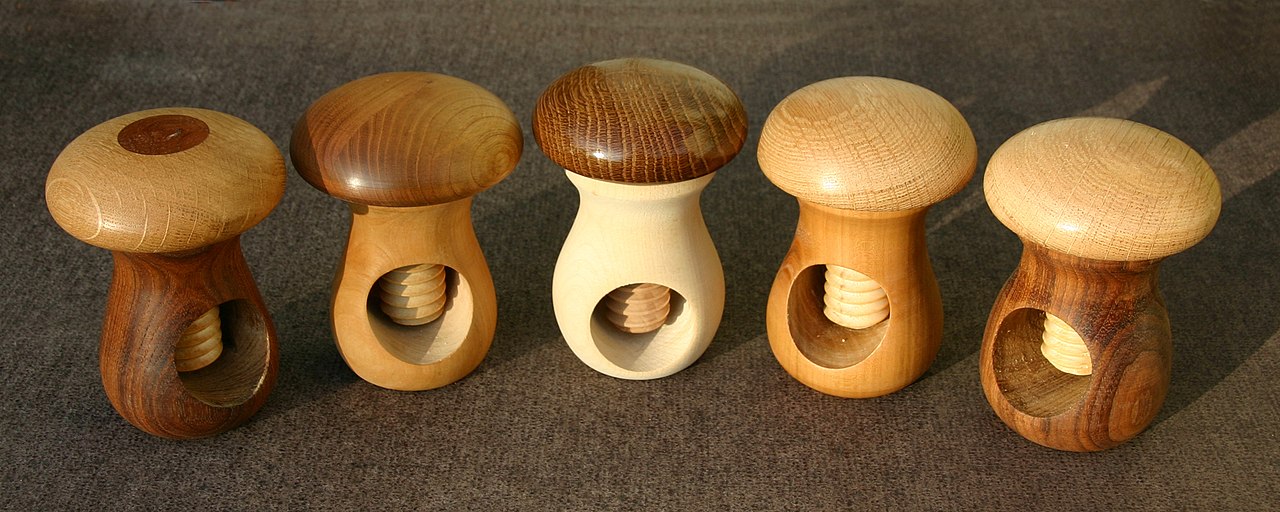
The Ultra Shear Round Carbide Insert Turning tool is designed for creating elegant slopes on both bowls and spindles. Its sharp blades can easily cut wood fibers without sanding. This tool can be used on a round carbide turning lathe to make even the most novice woodworkers look professional. These tools are also useful when hollowing out a cup.
Square carbide lathe tool
A square carbide lathe tool can be used for many different purposes. Carbide tools with a square shape are ideal for quickly removing bulky materials. They are also great for cutting flat areas. A square, slightly rounded carbide lathe tool is a good choice for final finishing cuts. A round carbide lathe tool is best for removing material nearly as effectively as a square tool and is useful for a variety of purposes.

A simple rougher is another excellent tool. The Simple Rougher is a great tool for roughing out the outside radius on a bowl or turning beads onto a spindle. The solid hard maple handle is easy to use and simplifies the task of turning straight lines. The handle comes from the USA, and it is manufactured in Grand Rapids. The tool's MSRP is less than comparable carbide tools.
A square carbide rogue is very similar to an ordinary roughing gouge, but it works differently. You would use a roughing saw to place the handle in contact with the wooden surface and then raise the handle to start shaving. Square carbide roughers work differently. You should place the tool shaft horizontally so that the cutting edge is aligned with the stock's center. This carbide rogue can be used to make tenons and turn bowls. It can also be used for tables and chairs.
FAQ
Can I make my living doing this job?
Yes! In fact, many woodworkers already do. According to the U.S. Bureau of Labor Statistics, the median annual woodworker wage was $34,000 in May 2012. This is significantly higher than the national average, which is $31,000 per year.
How can a beginner woodworker make money?
Many people are beginning to learn how build furniture to launch an online business. However, if you're just getting into furniture building, there are other options than selling on Etsy. Sell at craft fairs or other local events. Or you could offer workshops for others who want to learn how to build their own furniture. Consider offering your services if you have previous experience as a builder or carpenter.
Do you have any advice on how to start a woodworking business.
It can be difficult to start a woodworking shop. You won't mind working hard if your hobby is something you love. You'll likely enjoy the challenge of owning your business.
Remember that you may encounter unexpected problems when starting a new venture. You might run out money, or you may have to borrow unexpectedly. Or you might find that your customers aren’t willing or able to pay as much you had hoped. You need to be ready for these situations if you want to survive.
One good tip is to set up a separate bank account specifically for your business. You'll be able to track how much money comes in and out.
How do I calculate woodworking prices
It is essential to calculate costs as accurately as possible when pricing any project. Always ensure you are getting the best possible price for materials. It's also worth taking into account all the other factors that may affect the cost of your projects, such as time, skill level, and experience. If you want to get an idea of what you can expect to spend on different types of woodwork projects, check out our guide to the average price of common household DIY tasks.
Where can I find free woodworking plan?
Woodworking plans can be found online without the need to purchase books or magazines. Just search Google. Simply type "free woodworking” into the search box and you'll find hundreds of websites that offer free plans.
How much will it cost to get started?
Because every project is unique, there aren't exact numbers. But if you want to get an idea of how much money you'll need, consider these factors:
-
Materials cost
-
Tools and equipment
-
The time spent on the project
-
Hourly rate
-
How much profit can you anticipate to make
-
Hire help
If you're just starting out, you may decide to start small by making simple items such as boxes and picture frames. As you gain experience, you'll be able to tackle more complex projects.
Statistics
- Most woodworkers agree that lumber moisture needs to be under 10% for building furniture. (woodandshop.com)
- Overall employment of woodworkers is projected to grow 8 percent from 2020 to 2030, about as fast as the average for all occupations. (bls.gov)
- Woodworkers on the lower end of that spectrum, the bottom 10% to be exact, make roughly $24,000 a year, while the top 10% makes $108,000. (zippia.com)
- The U.S. Bureau of Labor Statistics (BLS) estimates that the number of jobs for woodworkers will decline by 4% between 2019 and 2029. (indeed.com)
External Links
How To
How to make wood joints
This tutorial will teach you how to join two pieces wood together. We will be using the "pocket-hole joint", which involves drilling holes in wood and then gluing them together. This method is great if your wood's straight and smooth. You may want to consider other methods, such as dowel joining. These are the steps
-
Drill Pocket Hole Joints. You will need to measure and mark the exact location of your pocket hole joint. Use a jigsaw or handheld drilling machine to drill 3/8 inch deep holes at the ends of each wood piece.
-
Sand Smooth. Sanding the wood's edges will help ensure that the joint won't split later.
-
Glue together. Apply glue on both sides of the wooden plank. Allow the wood to rest for five minutes before clamping it together.
-
Fix the Pieces together. Once the glue has dried, clamp the pieces together so they are flush.
-
Trim Joinery. Trim any excess wood surrounding the joint once the glue has dried completely.
You should leave enough space between the pieces to allow you to turn them inside-out.